从这一节开始,我们开始讲解 compose 最基础的动画 Api 使用,最基础也是最重要的部分,掌握这些基础的配置,会对后面的高阶动画的使用配置更加的得心应手
状态转移型动画
从一个状态切换到另外一个状态
 1
 2
 3
 4
 5
 6
 7
 8
 9
10
11
12
13
14
|
@Composable
fun AsStateAnim() {
    var big by remember { mutableStateOf(false) }

    /** 特点是有起始值和目标值,从一个初始状态切换到目标状态 **/
    val size by animateDpAsState(targetValue = if (big) 60.dp else 100.dp, label = "")

    Box(modifier = Modifier
        .size(size)
        .background(Color.Red)
        .clickable {
            big = !big
        })
}
|
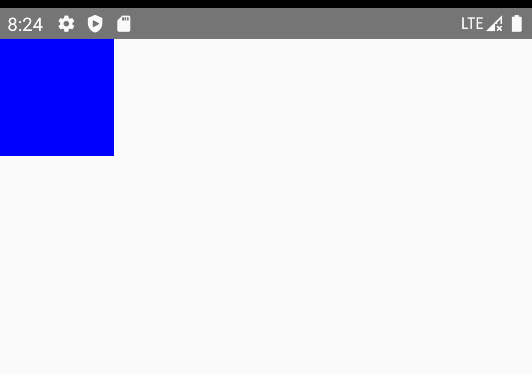
代码比较简单,它是通过按钮的点击改变 big 的 state 对象的值,这个值的改变也导致 animateDpAsState 中的 targetValue 发生改变,而返回值 size 又作用在了 Box 的控件上,在目标状态值发生改变的时候 animateDpAsState 内部有一个协程会以一种动画曲线的方式不断的改变 size 的值,然后再触发 ReCompose 刷新界面,这样就能看到动画效果了,代码运行后,如下所示
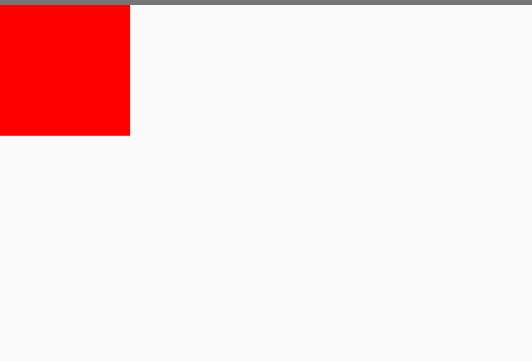
可以发现,控件的大小是一种以渐变的方式进行变大和变小的,而不是瞬间改变的,这种从大的状态变到小的状态,可以认为它就是一种状态转移型动画,状态转移型动画类似的 Api 还有很多,比如像如下这样的, 用法都是一模一样的,只是传递的数值不一样而已,在你的项目中,根据情况用那个 Api 你自然就知道了,这里就不举例了
状态转移型动画只是针对于从一个状态切换到另外一个状态这种场景的,它比较简单,但是如果这个时候你需要对中间状态有更多的需求,就无法做到了,就需要使用 流程定制型动画
流程定制型动画
可以定制动画中间过程
针对于流程定制型动画,需要使用到的 Api 是 Animatable , 介绍这个函数之前,可以再看下 animateXXXAsState 针对于状态切换的场景,其实他就是一个 Animatable ,只不过是针对其进行封装了,对一些更强大功能进行收敛了,只提供对目标值修改后开启动画,可以看下 animateDpAsState 源码
 1
 2
 3
 4
 5
 6
 7
 8
 9
10
11
12
13
14
15
16
17
18
19
20
21
22
23
24
25
26
27
28
29
30
31
32
33
|
fun animateDpAsState(
    targetValue: Dp,
    animationSpec: AnimationSpec<Dp> = dpDefaultSpring,
    label: String = "DpAnimation",
    finishedListener: ((Dp) -> Unit)? = null
): State<Dp> {
    return animateValueAsState(
        targetValue,
        Dp.VectorConverter,
        animationSpec,
        label = label,
        finishedListener = finishedListener
    )
}

// animateValueAsState 实现
@Composable
fun <T, V : AnimationVector> animateValueAsState(
    targetValue: T,
    typeConverter: TwoWayConverter<T, V>,
    animationSpec: AnimationSpec<T> = remember { spring() },
    visibilityThreshold: T? = null,
    label: String = "ValueAnimation",
    finishedListener: ((T) -> Unit)? = null
): State<T> {

    val toolingOverride = remember { mutableStateOf<State<T>?>(null) }
    // 内部也是使用的是 Animatable
    val animatable = remember { Animatable(targetValue, typeConverter, visibilityThreshold, label) }
    val listener by rememberUpdatedState(finishedListener)

    return toolingOverride.value ?: animatable.asState()
}
|
接下来,我们直接使用 Animatable 来使用状态切换的例子,稍后,给他赋予更多的功能
 1
 2
 3
 4
 5
 6
 7
 8
 9
10
11
12
13
14
15
16
17
18
19
20
21
22
|
fun AsStateBaseAnim() {
    var big by remember {  mutableStateOf(false)   }
    val bigAnim = remember(big) { if (big) 90.dp else 60.dp }

    /** 内部默认是 float 的转换器, 官方实现了各种转换器, dp 转换器, color 转换器等等, 内部其实就是对 value 值如何进行转换算法的 **/
    val anim = remember { Animatable(bigAnim, Dp.VectorConverter)}

    LaunchedEffect(key1 = big) {
        /** snapTo 的效果其实和 animateTo 是一模一样的, 区别是 snap 它没有动画, 瞬间到达设置的位置, 可以用来设置为起始点 **/
        /** 假定设置一个起始点  **/
        // anim.snapTo(if (big) 200.dp else 20.dp) // 这样是没有动画的,因为瞬间到达了

        anim.animateTo(bigAnim) // 设置目标值,开启动画
    }

    Box(modifier = Modifier
        .size(anim.value)
        .background(Color.Blue)
        .clickable {
            big = !big
        })
}
|
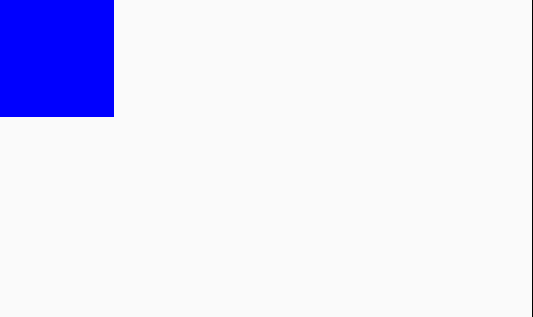
运行这段代码后,如下所示,和之前是一模一样的
解释这段代码之前,先介绍 Animatable 这个 Api 的参数设置,看下他的源码
1
2
3
4
5
6
|
class Animatable<T, V : AnimationVector>(
    initialValue: T,   // 设置的初始值
    val typeConverter: TwoWayConverter<T, V>, // 双向转换器
    private val visibilityThreshold: T? = null, // 可见阈值,一般用于弹簧动画中
    val label: String = "Animatable" // 标签
)
|
上述的注释已经很明显了,就是给这个动画设置一个初始值,然后再设置一个转换器,这个转换器,默认是一个 float 的类型,是这样的
1
2
3
4
5
6
7
8
|
fun Animatable(
    initialValue: Float,
    visibilityThreshold: Float = Spring.DefaultDisplacementThreshold
) = Animatable(
    initialValue,
    Float.VectorConverter, // 默认的 Float 类型的转换器
    visibilityThreshold
)
|
其中官方提供了很多类似的转换器,如下
 1
 2
 3
 4
 5
 6
 7
 8
 9
10
11
12
13
14
15
16
17
18
19
20
|
val Float.Companion.VectorConverter: TwoWayConverter<Float, AnimationVector1D>
    get() = FloatToVector

val Int.Companion.VectorConverter: TwoWayConverter<Int, AnimationVector1D>
    get() = IntToVector

private val FloatToVector: TwoWayConverter<Float, AnimationVector1D> =
    TwoWayConverter({ AnimationVector1D(it) }, { it.value })

private val IntToVector: TwoWayConverter<Int, AnimationVector1D> =
    TwoWayConverter({ AnimationVector1D(it.toFloat()) }, { it.value.toInt() })

val Rect.Companion.VectorConverter: TwoWayConverter<Rect, AnimationVector4D>
    get() = RectToVector

val Dp.Companion.VectorConverter: TwoWayConverter<Dp, AnimationVector1D>
    get() = DpToVector

val DpOffset.Companion.VectorConverter: TwoWayConverter<DpOffset, AnimationVector2D>
    get() = DpOffsetToVector
|
他们的实现是这样的,其中,挑选几个比较有代表的,举个例子 Dp.*VectorConverter* Float.*VectorConverter*, Offset.*VectorConverter* 如下
 1
 2
 3
 4
 5
 6
 7
 8
 9
10
11
12
|
private val DpToVector: TwoWayConverter<Dp, AnimationVector1D> = TwoWayConverter(
    convertToVector = { AnimationVector1D(it.value) },
    convertFromVector = { Dp(it.value) } // DP 转化了
)

private val FloatToVector: TwoWayConverter<Float, AnimationVector1D> =
    TwoWayConverter({ AnimationVector1D(it) }, { it.value }) // 无转化,直接返回了

private val OffsetToVector: TwoWayConverter<Offset, AnimationVector2D> = TwoWayConverter(
        convertToVector = { AnimationVector2D(it.x, it.y) },
        convertFromVector = { Offset(it.v1, it.v2) } // 二维坐标的转化
)
|
说白了,他们都是针对数值进行转换的 Api,比如上述中,FloatToVector 并没有对数值进行转换,仅仅是 it.value 直接返回,仍然还是一个 float 值也相同, 而针对 Dp 和 Offset 类型的转换,则是返回 Dp 和 Offset 对象,同时在这个地方,我们看到有 AnimationVector1D AnimationVector2D AnimationVector3D AnimationVector4D
这些是什么呢 ?其实他们针对的就是一维、二维、三维、四维,可以理解为比如 Float 类型的是 AnimationVector1D 针对的就是一维,一个坐标点,而 offset 有 x,y 的坐标,就是 AnimationVector2D 二维,他是存在两个坐标点的,以此类推
那么,为什么 compose 要这么设计一个转换器呢?原因就是在此,可以针对一维和二维的模型去做动画的计算,即使是针对颜色的色值渐变过渡,也是比较好处理的,比如下面的 Color 渐变转换器,同时这样也方便扩展
 1
 2
 3
 4
 5
 6
 7
 8
 9
10
11
12
13
14
15
16
17
18
19
20
21
22
23
|
private val ColorToVector: (colorSpace: ColorSpace) -> TwoWayConverter<Color, AnimationVector4D> =
    { colorSpace ->
        TwoWayConverter(
            convertToVector = { color ->
                val (l, a, b, alpha) = color.convert(ColorSpaces.Oklab)
                AnimationVector4D(alpha, l, a, b)
            },
            convertFromVector = { vector ->
                Color(
                    vector.v2.coerceIn(0f, 1f), // L (red)
                    vector.v3.coerceIn(-0.5f, 0.5f), // a (blue)
                    vector.v4.coerceIn(-0.5f, 0.5f), // b (green)
                    vector.v1.coerceIn(0f, 1f), // alpha
                    ColorSpaces.Oklab
                ).convert(colorSpace)
            }
        )
    }


val Color.Companion.VectorConverter:
        (colorSpace: ColorSpace) -> TwoWayConverter<Color, AnimationVector4D>
    get() = ColorToVector
|
其实他们的类型都是 TwoWayConverter 这个接口的实现类,后续我们要是有自己的算法,也是可以自己实现一个的,类似就是这样, 这里模仿的 Dp 的转换器
 1
 2
 3
 4
 5
 6
 7
 8
 9
10
11
12
13
14
|
interface TwoWayConverter<T, V : AnimationVector> {
    val convertToVector: (T) -> V

    val convertFromVector: (V) -> T
}

 // 自己实现一个, DP 类型的转换器
 object : TwoWayConverter<Dp, AnimationVector1D> {
        override val convertFromVector: (AnimationVector1D) -> Dp
            get() = { animationVector1D -> Dp(animationVector1D.value) }

        override val convertToVector: (Dp) -> AnimationVector1D
            get() = { dp -> AnimationVector(dp.value) }
}
|
对于 TwoWayConverter 类型转换器就讲到这里了,其实官方提供了非常多的转换器并没有都列举出来,需要用到的时候,临时翻看一下内部的 Api 源码,基本上都能够满足需求,遇到特殊的场景,自己定义一下就可以了
对于 Animatable 的配置,大概就是这些了,回到刚才动画的例子当中,Animatable 创建后了之后,同时还需要启动一个协程,才能启动动画,因为他的 animateTo 和 snapTo 都是一个 suspend 函数,都需要在协程中执行,而上面的例子就是通过点击事件的改变 big 的值,从而导致协程的重启,而 bigAnim 也会随着 big 的值而改变,最终通过 animateTo 到 bigAnim 目标值做一个动画
关于 snapTo 和 animateTo 唯一的区别就是 snapTo 是没有动画的,瞬间完成,如果在某一个时刻,你不需要动画,想瞬间回到某个位置,或者是设置一个新的起始点,可以用这个 Api
animateTo ()
1
2
3
4
5
6
|
suspend fun animateTo(  // 是一个 suspend 函数, 需要在协程中执行
        targetValue: T, // 目标值
        animationSpec: AnimationSpec<T> = defaultSpringSpec, // 动画规格,默认是弹簧动画
        initialVelocity: T = velocity, // 初始速度
        block: (Animatable<T, V>.() -> Unit)? = null // 动画的每一帧
)
|
代码注释已经很清楚了,animateTo 前提条件是需要在协程中执行,会从当前的初始状态到 targetValue 目标值做一个动画,如果动画正在执行中,同时又 animateTo 调用了一个新的动画,那么会重新以当前的状态作为初始状态到 targetValue 目标值做一个动画
block 函数是监听动画的每一帧的,后面会讲如何使用,initialVelocity 是设置一个初始速度,速度越大,滑动越快,这个初始速度,一般会配合 VelocityTracker 来跟踪手指在屏幕上滑动的坐标和时间,在松手后的计算出一个速度来做惯性滑动,一般情况下是在列表中或者地图场景,比如按下并快速滑动至松手后,还是保持一个速度直到惯性衰减后停下来,这里不做过多的介绍,可以看下官网-手势和动画 和我在 stackoverflow 的一个回答
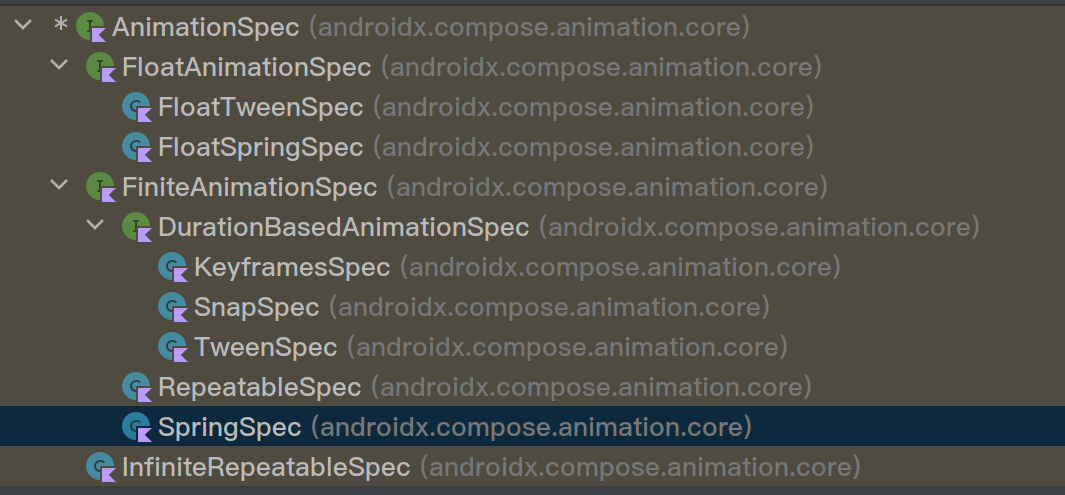
animationSpec
接下来就是各种 animationSpec 的配置了, 他的源码中,类的结构图是这样的,我们接下来一个一个尝试一下,首先看下 tween 是如何使用的
TweenSpec
 1
 2
 3
 4
 5
 6
 7
 8
 9
10
11
12
13
14
15
16
17
18
19
20
21
|
@Composable
fun AnimSpec() {
    var big by remember {  mutableStateOf(false)  }

    val bigAnim = remember(big) {    if (big) 90.dp else 60.dp  }

    val anim = remember { Animatable(bigAnim, Dp.VectorConverter  }

    LaunchedEffect(key1 = big) {
        anim.animateTo(bigAnim, tween(easing = FastOutLinearInEasing))

        // anim.animateTo(bigAnim, SnapSpec(delay = 300)) // SnapSpec 没有动画,瞬间到达目标状态,和 snapTo 是一样的
    }

    Box(modifier = Modifier
        .size(anim.value)
        .background(Color.Blue)
        .clickable {
            big = !big
        })
}
|
运行后是这样的,点击按钮,从初始状态 60.dp 到目标状态 90.dp 的以动画的方式进行放大和缩小
接着看看 tween 源码实现
1
2
3
4
5
|
fun <T> tween(
    durationMillis: Int = DefaultDurationMillis, // 默认的动画时间
    delayMillis: Int = 0, // 延时时间(延时多久后执行动画)
    easing: Easing = FastOutSlowInEasing // 速度曲线模型
): TweenSpec<T> = TweenSpec(durationMillis, delayMillis, easing)
|
这里的参数配置也比较简单,DefaultDurationMillis 的默认时间是 300 毫秒,延时时间是 0,这个延时时间也很好理解,就是在点击后,需要延时多久后再执行动画,默认 0,就是立即执行,唯一比较难理解的是 easing 速度曲线, (英文翻译, 缓动), 他可以理解为在传统 Android 中的动画插值器 interceptor,上述设置的是 FastOutLinearInEasing ,它就是默认的过渡效果,以快速开始并慢慢减速直到结束
- 几种常见的速度曲线模型
- FastOutSlowInEasing 默认的过渡效果,它以快速开始并慢慢减速到结束。适用于大多数常规动画
- FastOutSlowInEasing 默认的过渡效果,它以快速开始并慢慢减速到结束。适用于大多数常规动画
- LinearOutSlowInEasing 以线性速度开始并逐渐减速到结束。适用于需要匀速过渡的动画
- FastOutLinearInEasing 以快速开始并以线性速度进行过渡。通常用于突出起始状态的动画
- LinearEasing 简单的线性过渡效果,从开始到结束以恒定速度进行过渡
SnapSpec
它是一个没有渐变过渡动画的 Api,他的作用场景,是某一个时刻,不需要渐变过程,瞬间回到某一个地方(重新设置起始点)可以使用它,还是上面的代码,只是修改执行方式,延时一个 300 ms,最终运行后是这样的
1
|
anim.animateTo(bigAnim, SnapSpec(delay = 300)) // 无渐变过程
|
keyFrameSpec
可以控制某个时间线上的关键帧
 1
 2
 3
 4
 5
 6
 7
 8
 9
10
11
12
13
14
15
16
17
18
19
20
21
22
23
24
25
26
27
28
29
30
31
32
33
34
35
36
37
38
39
40
41
42
43
44
45
46
47
|
@Composable
fun KeyFrameSpecTest() {
var goAnim by remember { mutableStateOf(false)}
/** 设置偏移值 **/
val offset = remember(goAnim) { if (goAnim) 200.dp else 0.dp }
/** 使用 Dp 转换器 **/
val offsetAnim = remember { Animatable(offset, typeConverter = Dp.VectorConverter) }
LaunchedEffect(key1 = goAnim) {
/**
* 对关键帧进行操作的动画, 可以简写成 keyframes { }
*
*at 和 with 是 infix 中缀函数
*/
offsetAnim.animateTo(targetValue = offset, animationSpec = keyframes {
durationMillis = 3000
/** 可以控制每个时间线上的关键帧 **/
/** 对目标值 200dp 过程做关键帧的操作 **/
/** 设置关键帧 **/
/** 表示在动画过程中的第1000毫秒时,属性的值会运动到 50dp的位置 **/
/** with FastOutSlowInEasing 开始加速后减速, 这个减速的区间是从 50.dp 到终点的速度曲线(也就是下一个运动区间) **/
50.dp at 1000 with FastOutSlowInEasing
/** 在2500毫秒的时候, 需要位移到60dp, 然后以线性开始后减速到下一个关键帧 **/
60.dp at 2500 with LinearOutSlowInEasing
/** 终点, 最后一个不用设置with, 因为这里的已经是最后一帧了 **/
120.dp at 3000
})
}
Box(modifier = Modifier.fillMaxSize()) {
Box(modifier = Modifier
.size(90.dp)
.offset(x = offsetAnim.value)
.clickable {
goAnim = !goAnim
}
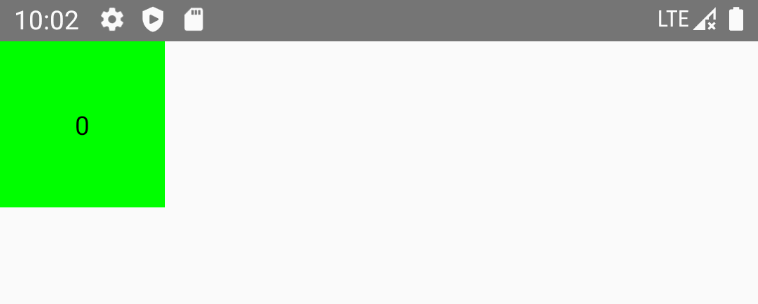
.background(Color.Green)) {
Text(
text = offsetAnim.value.value.toInt().toString(), textAlign = TextAlign.Center, modifier = Modifier.align(Alignment.Center)
)
}
}
}
|
这里有区别不同就是 animationSpec 的 keyframes 设置了,这里可以这么想象一下,平常我们做一个视频的话,是不是有轨道可以设置的,比如我们经常看网上的视频,在某些精彩片段的时候,是一个慢动作的视频,其余的时候是正常的,如果有制作过视频经验的人,应该会很好理解,类似于下面这样的

那么上面代码,对关键帧的设置大概意思就是,在第 1000ms 的时候,需要运动到 50dp,然后以 FastOutSlowInEasing 的曲线运动到下一个关键帧,这里的速度曲线作用的范围也就是 50dp 到 60dp 这个区间,然后在 2500 毫秒的时候,位置运动到 60 dp,然后再以 LinearOutSlowInEasing 的曲线位移到下一个关键帧。
所以最终运行后,是这样的,最后闪一下到 200 dp,是因为动画设置的目标值是 200dp, 而我们对关键帧的操作是仅仅在 120dp 的范围
其中 at with,是 kotlin 的中缀函数,它是一种简化写法,他的源码也很简单, 其实就是设置了一个 entity 对象,如下
 1
 2
 3
 4
 5
 6
 7
 8
 9
10
11
12
|
internal val keyframes = mutableMapOf<Int, KeyframeEntity<T>>()
// at 函数,对时间上的关键帧设置
infix fun T.at(/*@IntRange(from = 0)*/ timeStamp: Int): KeyframeEntity<T> {
            return KeyframeEntity(this).also {
                keyframes[timeStamp] = it
            }
        }

// with 函数,设置速度曲线
infix fun KeyframeEntity<T>.with(easing: Easing) {
     this.easing = easing
}
|
springSpec
弹簧动画,它是物理模型的动画, 区别不能设置时间, 是根据物理模式来计算的最终的目标值的
为什么 springSpec 是一个物理模型动画呢 ?因为它更加接近于现实中弹簧规律,动画看上去自然并且平滑,而其他的动画 Api 是基于插值算法来做的
还是上面的例子,我们把协程函数换一下就可以了
 1
 2
 3
 4
 5
 6
 7
 8
 9
10
11
|
/** 弹簧动画 **/
LaunchedEffect(key1 = goAnim) {
        /**
         * 弹簧动画
         * springSpec, 可以简写成 spring, 它是物理模型动画
         */
        offsetAnim.animateTo(
            targetValue = offset,
            animationSpec = spring(dampingRatio = Spring.DampingRatioHighBouncy, stiffness = Spring.StiffnessMediumLow)
        )
 }
|
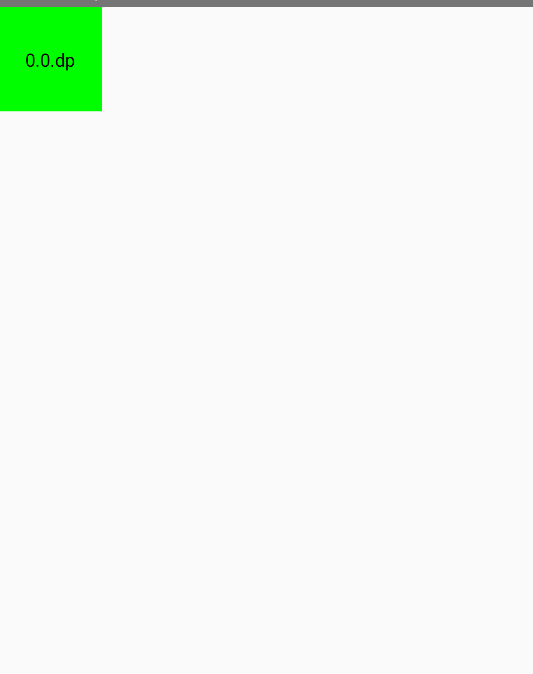
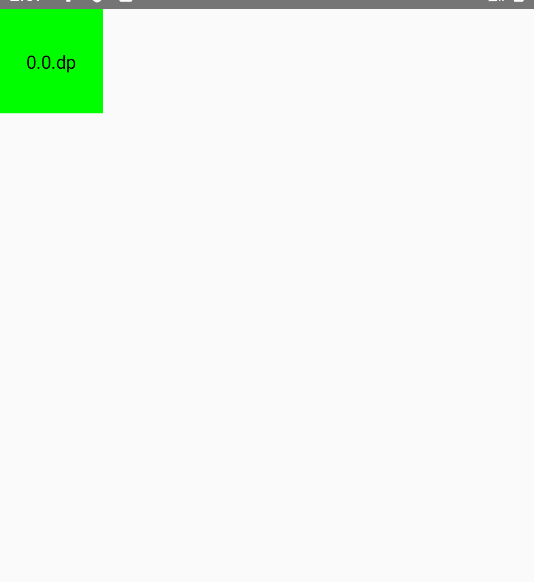
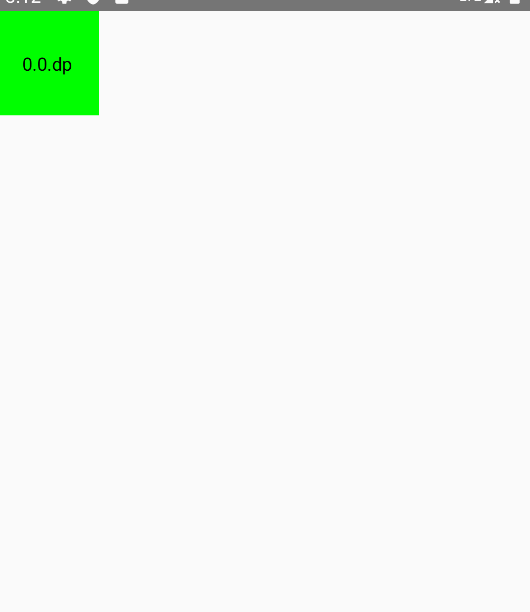
运行后是这样的
其他的代码都和之前一样,就不再解释了,只看看 spring 如何配置
1
2
3
4
5
|
fun <T> spring(
    dampingRatio: Float = Spring.DampingRatioNoBouncy, // dampingRatio: 阻尼比, 可以理解为弹簧的晃动的幅度, 数值越小晃动越大
    stiffness: Float = Spring.StiffnessMedium, // stiffness: 刚度, 可以理解为弹簧的硬度, 硬度越高, 回弹的越快, 想象一下现实中的弹簧立马弹回, 数值越大, 硬度越高
    visibilityThreshold: T? = null // 可见性阈值,这个参数设置就是比如弹簧最终可能会在很小的范围内抖动,当动画的距离或速度小于该阈值时,动画会被认为到达了最终状态并停止动画。 大白话解释:可以想象在现实的世界中,一个弹簧最终在很小的范围内一直一直不断的弹,可能在 0.0001111111 这样很小的范围,而对应到代码中,这个数值用来忽略的,也避免不断的绘制
)
|
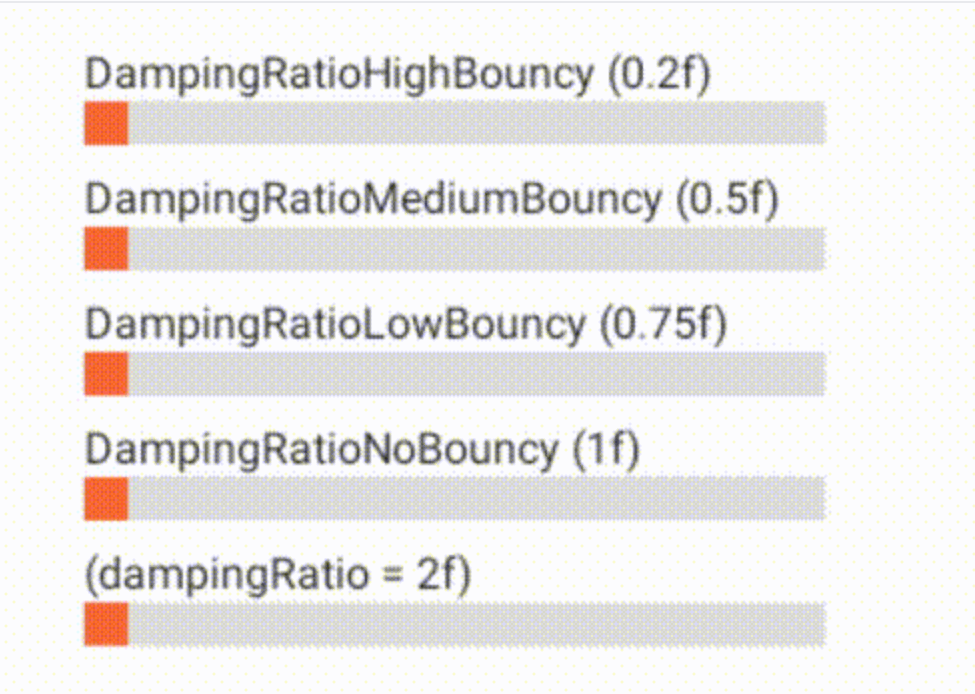
其中,对于 dampingRatio 和 stiffness 官方默认提供了几个 api 设置,他们的效果大概是这样的
RepeatableSpec
可重复的动画
 1
 2
 3
 4
 5
 6
 7
 8
 9
10
11
12
13
14
15
16
17
18
19
20
21
22
23
24
25
26
27
28
29
|
@Composable
fun RepeatableSpecTest() {
var goVertical by remember { mutableStateOf(false) }
val verticalOffset = remember(goVertical) { if (goVertical) 200.dp else 0.dp }
val verticalAnim = remember { Animatable(verticalOffset, typeConverter = Dp.VectorConverter)}
LaunchedEffect(goVertical) {
verticalAnim.animateTo(
verticalOffset, animationSpec = RepeatableSpec(
initialStartOffset = StartOffset(300, StartOffsetType.FastForward), // 快进到 300 秒的地方直接开始
iterations = 3,
repeatMode = RepeatMode.Reverse,
animation = tween(durationMillis = 600)
)
)
}
Box(modifier = Modifier.fillMaxSize()) {
Box(modifier = Modifier
.size(80.dp)
.offset(y = verticalAnim.value)
.clickable { goVertical = !goVertical }
.background(Color.Green)) {
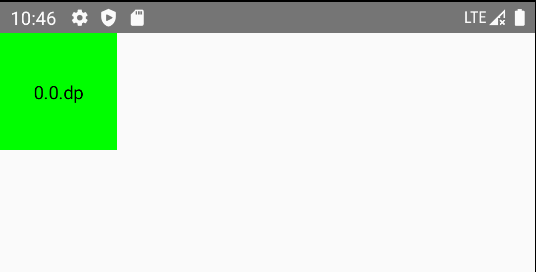
Text(text = verticalAnim.value.toString(), modifier = Modifier.align(Alignment.Center))
}
}
}
|
照例还是先看下 RepeatableSpec 的参数设置
1
2
3
4
5
6
|
class RepeatableSpec<T>(
    val iterations: Int,
    val animation: DurationBasedAnimationSpec<T>,
    val repeatMode: RepeatMode = RepeatMode.Restart,
    val initialStartOffset: StartOffset = StartOffset(0) // 初始起始偏移量
)
|
- iterations 重复的次数
- animation 设置作用的动画, 注意他是继承的是 DurationBasedAnimationSpec(基于时间设置的动画) 所以他只能够被设置为 keyFrame snap tween 等 spec 的动画
- repeatMode 重复模式, start, 从起始位置开始重复, Reverse 从目标值开始重复, 如果使用 Reverse 必须是奇数, 因为如果是偶数的话, 假如是 2, 由于动画最终会回到目标值, 会瞬间到到目标值(没有动画)
- initialStartOffset 初始起始偏移量, 是根据时间来设置的, 他还有另外的参数:StartOffsetType.Delay 延时执行 StartOffsetType.FastForward 快进, 直接快进到某个时间点, 比如 300ms, 快进到 280 就会看到 280 直接到 300 毫秒的动画
运行代码后看看几种例子现象
- 上述例子是快进到 300 秒的地方直接开始,动画也就是从 300 秒到 600 秒之间,重复的次数是 3 次,Reverse 模式,从目标值开始重复,这里的目标值也就是 200dp,所以 3 次后,停留的位置也在 200dp 的地方
- 上述的代码,只改变重复次数为 2 次,看看效果
这里有个最大的区别是,动画停止的时候直接瞬移到 200dp的位置了,因为动画重复的位置从目标值开始重复,2次后位置理论上在 0dp 的位置,但是因为要回到目标值,所以最终会瞬间移动到 200dp 的位置
- 如果重复次数还是为 2 次,但是重复模式改成了 Restart (从起始位置开始重复)看看效果
可以看到每次开始都是瞬间从 0dp 的位置开始,这就是 Restart 模式,最终动画停止到目标状态 200dp

infiniteRepeatable
和 RepeatableSpec 几乎一样的, 只是 InfiniteRepeatable 是一个无线循环的动画
 1
 2
 3
 4
 5
 6
 7
 8
 9
10
11
12
13
14
15
16
17
18
19
20
21
22
23
24
25
26
|
fun InfiniteRepeatableSpecTest() {
    var goVertical by remember {  mutableStateOf(false)   }

    val verticalOffset = remember(goVertical) {     if (goVertical) 200.dp else 0.dp  }

    val verticalAnim = remember {  Animatable(verticalOffset, typeConverter = Dp.VectorConverter)  }

    LaunchedEffect(goVertical) {
        verticalAnim.animateTo(
            /** 是一个无线循环的动画  **/
            verticalOffset, animationSpec = infiniteRepeatable(
                animation = tween(), repeatMode = RepeatMode.Reverse
            )
        )
    }

    Box(modifier = Modifier.fillMaxSize()) {
        Box(modifier = Modifier
            .size(80.dp)
            .offset(y = verticalAnim.value)
            .clickable { goVertical = !goVertical }
            .background(Color.Green)) {
            Text(text = verticalAnim.value.toString(), modifier = Modifier.align(Alignment.Center))
        }
    }
}
|
参数配置和 RepeatableSpec 几乎是一模一样的,只是它是无限制重复的,运行后如下
好了,关于各种 animationSpec 的使用,和一些参数配置都基本讲完了,至于 FloatxxxSprc 类似的就没有讲了,因为本质上都是一样的,只是它是限制了泛型是 Float 而已,如果你会其他的,这个自然而然也是会的